一、nginx+Lua环境部署
1、系统基础信息
1 | # ifconfig eth0|grep 'inet addr'|awk -F ":" '{print $2}'|awk '{print $1}' |
2、安装基础库
1 | yum -y install gcc gcc-c++ |
3、创建Nginx运行的普通用户
1 | useradd -s /sbin/nologin -M www |
4、下载需要的程序并安装
1 | cd /usr/local/src/ |
5、安装LuaJIT Luajit是Lua即时编译器
1 | tar zxvf LuaJIT-2.0.4.tar.gz |
6、安装nginx并加载模块
1 | cd nginx-1.9.4/ |
安装完毕后,下面可以测试安装了,修改nginx.conf 增加第一个配置1
2
3
4
5
6
7
8
9
10
11
12
13
14
15
16
17
18 server {
listen 80;
server_name localhost;
#charset koi8-r;
#access_log logs/host.access.log main;
location /hello {
default_type 'text/plain';
content_by_lua 'ngx.say("hello,lua")';
}
error_page 500 502 503 504 /50x.html;
location = /50x.html {
root html;
}
}
启动nginx1
2
3
4/usr/local/nginx/sbin/nginx -t
nginx: the configuration file /usr/local/nginx/conf/nginx.conf syntax is ok
nginx: configuration file /usr/local/nginx/conf/nginx.conf test is successful
/usr/local/nginx/sbin/nginx
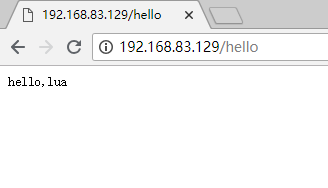
7、测试看lua环境是否正常
二、openresty实现WAF功能
1、系统基础信息
1 | # ifconfig eth0|grep 'inet addr'|awk -F ":" '{print $2}'|awk '{print $1}' |
2、安装基础依赖包
1 | yum install -y readline-devel pcre-devel openssl-devel |
3、下载并编译安装openresty
1 | cd /usr/local/src/ |
4、测试openresty安装
1 | # vim /usr/local/openresty/nginx/conf/nginx.conf |
5、WAF部署:在github上克隆下代码
1 | yum -y install git |
6、修改Nginx的配置文件,加入(http字段)以下配置。注意路径,同时WAF日志默认存放在/tmp/日期_waf.log
1 | # vim /usr/local/openresty/nginx/conf/nginx.conf |
7、根据日志记录位置,创建日志目录
1 | # mkdir /tmp/waf_logs |
8、配置信息与注释
1 | # cat /usr/local/openresty/nginx/conf/waf/config.lua |
三、启用waf并做测试
1、模拟sql注入即url攻击

日志显示如下,记录了UA,匹配规则,URL,客户端类型,攻击的类型,请求的数据1
2# tail -f /tmp/2018-07-30_waf.log
{"user_agent":"Mozilla\/5.0 (Windows NT 10.0; Win64; x64) AppleWebKit\/537.36 (KHTML, like Gecko) Chrome\/67.0.3396.99 Safari\/537.36","rule_tag":"\\.(bak|inc|old|mdb|sql|backup|java|class|tgz|gz|tar|zip)$","req_url":"\/eastmonet.sql","client_ip":"192.168.83.1","local_time":"2018-07-30 10:46:52","attack_method":"Deny_URL","req_data":"-","server_name":"localhost"}
2、使用ab压力测试工具模拟防CC攻击
1 | # ifconfig eth0|grep 'inet addr'|awk -F ":" '{print $2}'|awk '{print $1}' |

将对方IP放入黑名单1
2# echo 192.168.83.131 >> /usr/local/openresty/nginx/conf/waf/rule-config/blackip.rule
# /usr/local/openresty/nginx/sbin/nginx -s reload
再拿192.168.83.131访问的时候就提示403了
将对方IP放入白名单1
2[root@tiejiang-src1 ~]# echo 192.168.83.131 >> /usr/local/openresty/nginx/conf/waf/rule-config/whiteip.rule
[root@tiejiang-src1 ~]# /usr/local/openresty/nginx/sbin/nginx -s reload
此时将不对此ip进行任何防护措施,所以sql注入时应该返回404
目录:
- waf目录:/usr/local/openresty/nginx/conf/waf
- 配置文件:/usr/local/openresty/nginx/conf/waf/config.lua
- Waf的ip黑名单:/usr/local/openresty/nginx/conf/waf/rule-config/blackip.rule
- Waf的ip白名单:/usr/local/openresty/nginx/conf/waf/rule-config/whiteip.rule